Blog, Front Slider, Uncategorized
How To Prune Tomatoes

Jun
When growing tomatoes, the ultimate goal is to help the plant yield as much ripe fruit as possible. If you’re growing indeterminate or “vining” varieties (Big Boy, Beef Master, most heirlooms), pruning your plants to remove unwanted shoots and leaves ensures that all the nutrients are going to the tomatoes. If you’re growing a determinate variety (Biltmore, Heinz, Patio), too much pruning is counterproductive. See Step 1 to learn when and how to prune a tomato plant.
Determine which variety you’re growing. Before you make any cuts, figure out whether you’re growing an indeterminate or determinate variety of tomato plant. Indeterminate varieties grow like vines, and they must be trained upright on poles and pruned in order to grow correctly. Determinate varieties contain themselves before they grow into a bush, and they naturally direct their energy toward fruiting without needing as much intervention. Here are the common varieties of each:
- Indeterminate: Big Boy, Beef Master, Black Prince, German Queen, most cherry tomato varieties and most heirloom varieties.
- Determinate:Ace 55, Amelia, Better Bush, Biltmore, Heatmaster, Heinz Classic, Mountain Pride and Patio.

Step 2
Locate the suckers for removal. Look for the tiny new branches sprouting in the spot where a branch meets the stem on an indeterminate plant. These are called “suckers” and they’re what you want to remove. Suckers left to grow will take energy from the rest of the plant and cause the plant to bear fewer fruits. This isn’t always a bad thing, but strategically removing suckers will help your plant bear large fruit all season long.
- Wait for the stems and leaves below the first set of flowers to turn yellow before doing anything.

Step 3
Remove all suckers and their leaves below the first flower cluster. Do this no matter what kind of tomato plant you have. This keeps the plant strong by helping it grow a sturdy central stem. [1] This should ensure that the majority of the nutrients are sent to the fruits, instead of being wasted on the unwanted growing tips.
- To remove a sucker, grab a growing tip by the base between the thumb and forefinger and bend it back and forth until it snaps cleanly. This should ideally be done when the shoot is young and supple. The small wound will heal quickly. This is called “simple pruning”.
- As for stems and leaves, not the suckers, growing below the first flower cluster: If you live in a warmer zone such as Zone 9, you should leave them on until they turn yellow. They are important for helping to shade the ground until the plant matures. On the other hand, if your plant is in a humid environment (such as a greenhouse), remove everything below the first flower cluster to improve ventilation. Humidity can make it easier for sicknesses to flourish, and it also causes the wounds that are created while pruning to dry up more slowly making the plant longer vulnerable. By improving ventilation, you’re helping to protect the plant.
Step 4
Leave the thicker shoots. Thicker suckers should not be snapped off, since this could damage the whole plant. If it’s thicker than a pencil, use the “Missouri pruning” method and pinch out just the tip of the sucker, leaving one or two leaves behind for photosynthesis and to protect developing fruit from sun scald. The drawback is that suckers will develop from the stem that you leave behind, which will require additional pruning. This technique is better when you’re dealing with large suckers; if the wound becomes diseased, it will be further away from the main stem. This method also leaves a few inches on the sucker to reduce the shock to the plant.
- Prune suckers all summer long to keep the plant healthy. They grow quickly, so you may need to prune once or twice a week
Step 5
For indeterminate varieties, pinch off all but four or five fruit bearing trusses.These are the branches that grow from the main stem above the first flower cluster. Four or five will produce large, healthy fruit, but any more than that and the fruit will be small and scant. Choose four or five sturdy trusses to keep, then pinch out any additional side shoots, leaving the plant’s top shoot intact, known as the terminal shoot.
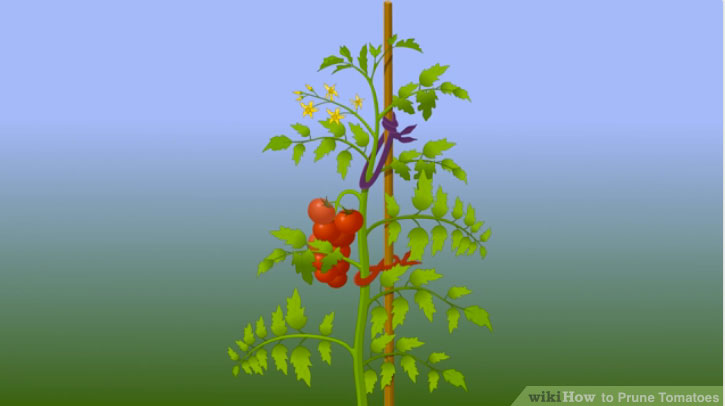
- Make sure the vine-like plants are tied to supports after flowering occurs. Otherwise, the vine will grow along the ground and won’t produce healthy tomatoes.[3]
- Determinate plants already have a predetermined number of stems that will naturally grow, so there’s no need to do any pruning above the flower cluster. If you prune above the flower cluster, you’ll be removing fruit-bearing branches without helping the plant.[4]

Step 6
Remove yellow leaves. Yellow leaves are leaves that use up more sugar than they produce. As the plant begins to mature, the lower leaves will naturally begin to yellow and wilt. This is perfectly normal, so pull these from the plant when they appear. It will keep the plant fresh and help ward off disease.

Step 7
Top the plant. To get the best out of the last growth of the season, it is necessary to “top” the plant. About a month before the first expected frost, or when the plant hits the roof of your greenhouse, remove the plant’s terminal shoot. At this point in the season, the tomatoes currently growing will have a limited time to reach maturity, so all nutrients must be directed straight to the fruit.
This article was sourced from wikihow – http://www.wikihow.com/Prune-Tomatoes